Instancing
The module provides an instancing system with the VoxelInstancer node. This node must be added as child of a voxel terrain. It allows to spawn 3D models on top of the terrain's surface, which can later be removed when modified.
It can spawn two different kinds of objects:
- Multimesh instances. They can be extremely numerous, and can optionally have collision.
- Scene instances. They use regular scenes, however it is much slower so should be tuned to low numbers.
This system is primarily intented at natural spawning: grass, rocks, trees and other kinds of semi-random foliage. It is not suited for complex man-made structures like houses or villages, although scene instances can be used in some cases, if the available features suit your game.
VoxelInstanceLibrary
Library setup
In order to spawn items, VoxelInstancer needs a VoxelInstanceLibrary resource. This resource contains a list of all the items that can be spawned, and how they will be placed.
Select a VoxelInstancer. In the inspector, assign a library to the library property, or create a new embedded one. Then click on the library resource. Buttons appear at the top of the inspector:

You can add items to the library by clicking the "+" icon, and choose Add Multimesh item.
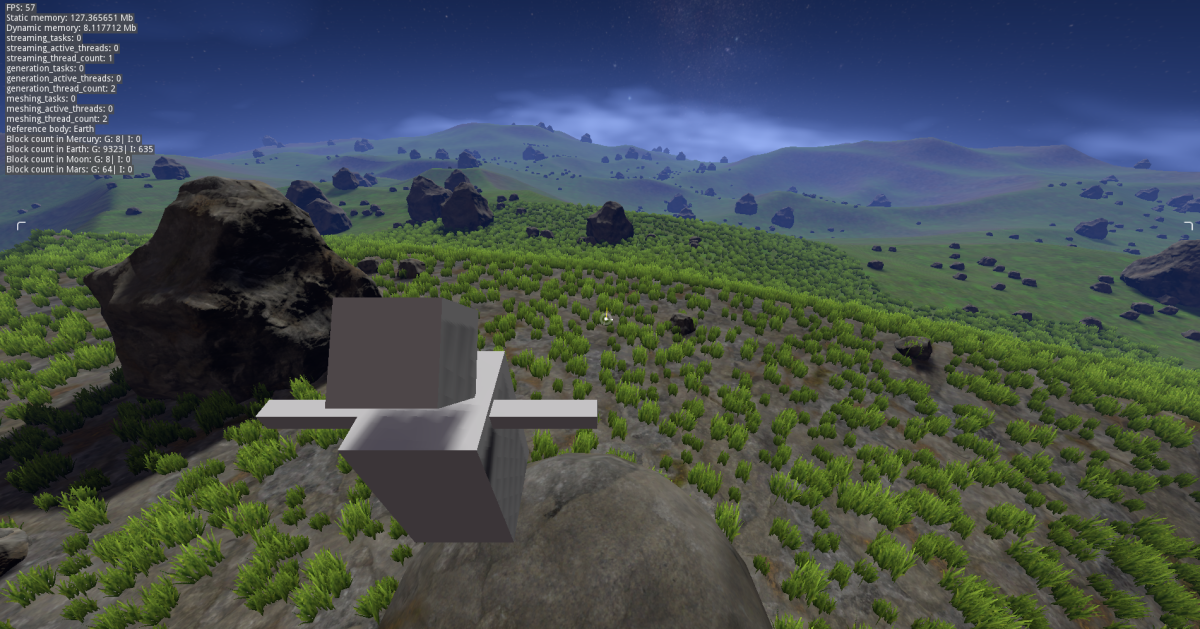
Items created this way come with a default setup, so you should be able to see something appear on top of the voxel surface.
Note
If you are making a planet, you may want to set the up_mode of VoxelInstancer to Sphere mode. This will tell the instancer where the upward direction is, and will align the items according to the local origin of the terrain.
Block LOD
The range at which items spawn is based on the LOD system of the voxel terrain itself, either on high-resolution chunks, or low-resolution ones. This is configured in the lod_index property of VoxelInstanceLibraryItem. For example, choosing 0 will make the item spawn on chunks of LOD0 at closest range, and fade quickly in the distance. Higher indexes will spawn on bigger chunks covering a larger range.
Usually landscapes may be composed of multiple layers so that the closer you get, the more details come in. Bigger items use high lod indexes to be seen from far away, while smaller items may use lower indexes.
Note
When making grass or other items, it may be a good idea to fade meshes based on distance from the camera using a custom shader, so they won't disappear abruptly. Using a ground texture of similar colors also helps to make it blend.
Placement precision
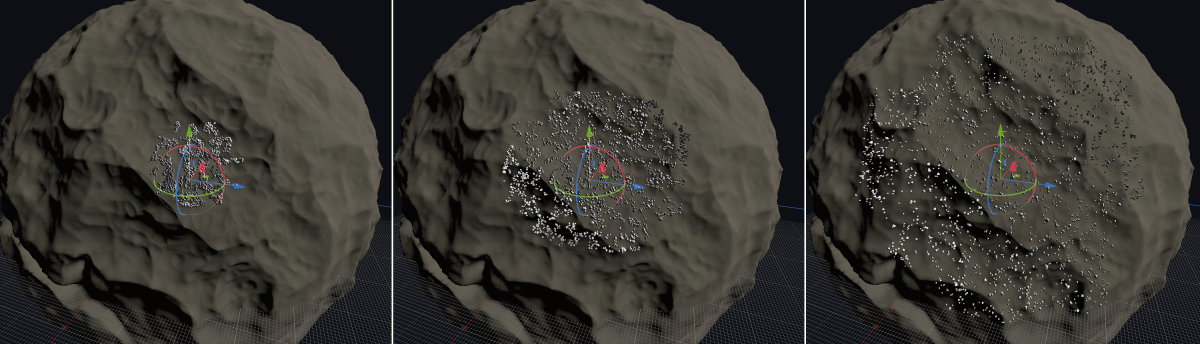
There is a balance to consider when choosing the appropriate lod_index: currently, larger indexes are much more imprecise, because they work on top of a lower-resolution mesh. This allows to generate instances much quicker at larger distances, without having to calculate full-precision LODs.
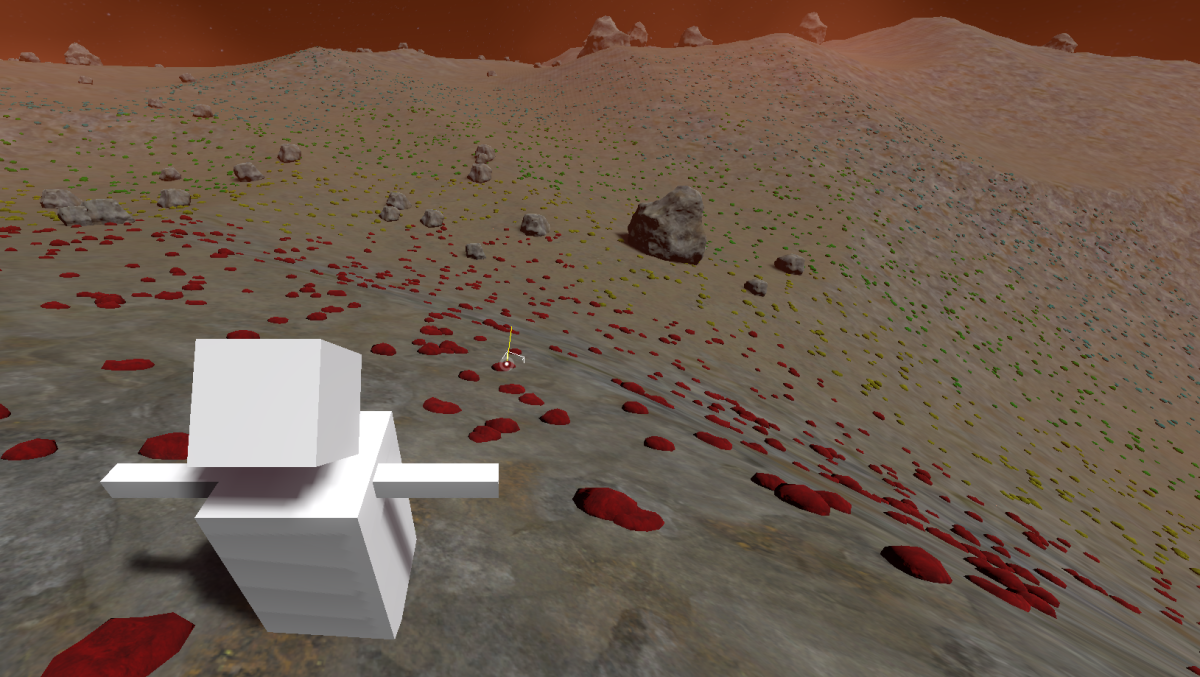
The downside is, as getting closer and terrain calculates higher-resolution LODs, it's possible that such instances are seen floating above ground, or sinking into it. This mostly happens in areas with sharp changes such as ridges, crevices or caves:
Offset along normal
A first option to adjust placement, is to adjust the offset_along_normal parameter in the generator associated to the item. This depends on the asset, so designing them such that they can have part of their bottom sunk into the ground can give some margin of error.
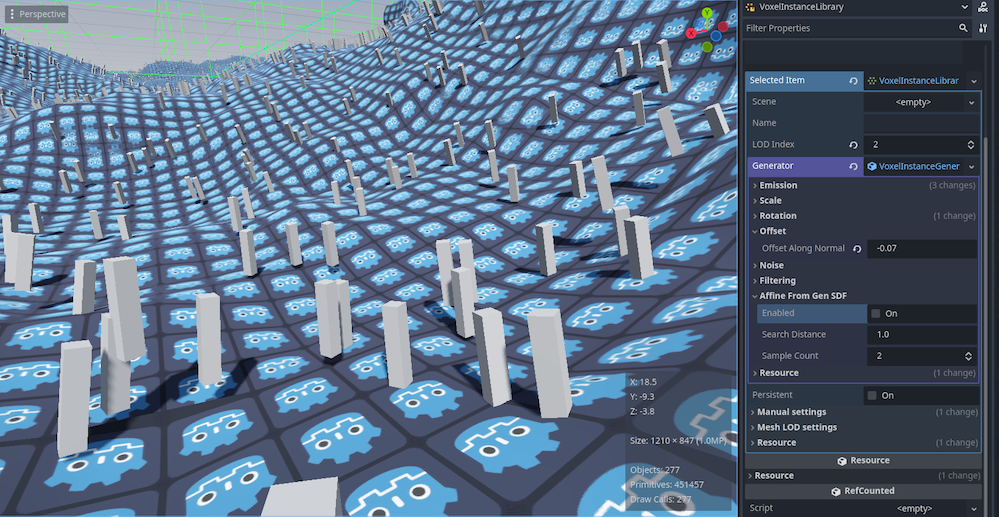
Snapping from generator SDF
Another option is to enable snap_to_generator_sdf_enabled, at the cost of slower instance generation. This is preferably used when lod_index > 0, as LOD0 already has maximum precision.
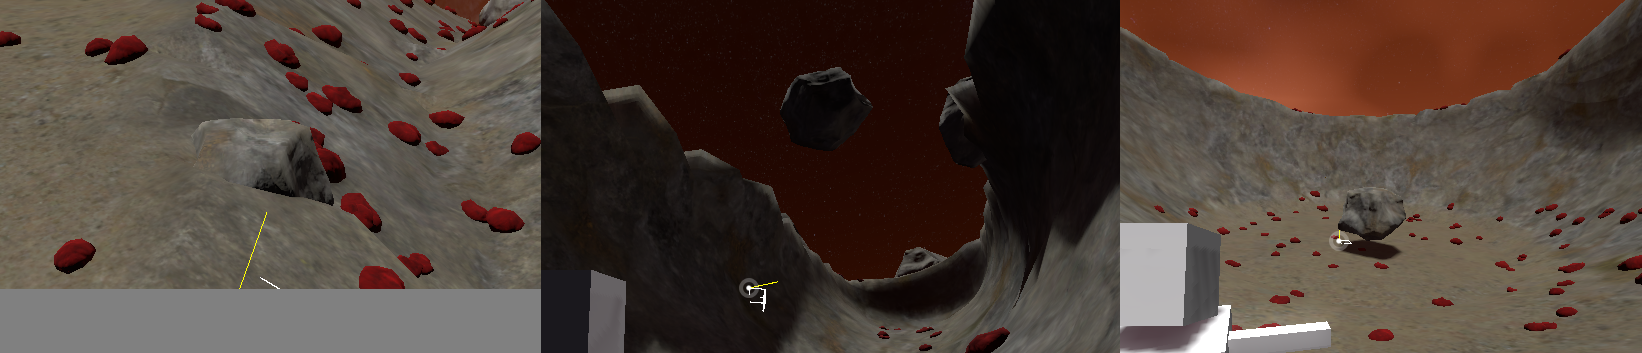
Without snapping:
With snapping:

This option queries the VoxelGenerator at floating point positions to approximate where the surface is, assuming the mesh-based position was a good starting point.
The generator can only return SDF values, which roughly tells how "close" each 3D point is from the surface. With at least 2 nearby samples or more, we can interpolate to snap positions closer to that surface. So this is not an accurate snapping, but it can improve positionning significantly.
Limitations:
- Requires a generator that supports series generation (i.e query arbitrary floating point positions to get voxel data from, instead of voxel chunks). At time of writing, only
VoxelGeneratorGraphsupports this. - Doesn't work if the terrain is modified: if a player comes back to the edited area and instances have to re-generate on top, estimations from the generator will not account for edited areas. To workaround this, instances could be set as
persistent, so editing terrain marks them as modified and saves their positions onwards instead of re-generating. - Tends to "bury" or "float" instances far away when their low-resolution mesh is active, since they get moved closer to the high-resolution one. This should however not be as noticeable as before, when that was happening at close range.
Research
More options may be researched in the future in case the current workarounds aren't enough:
- Gradually snap instances as higher-resolution meshes become available. Requires fast mesh raycast, if possible doable from threads (that unfortunately excludes Godot physics).
Mesh LOD
A secondary LOD system is included, which applies to meshes themselves, to some limited extent. It allows to reduce vertex count over distance from within a set of visible meshes. It only applies to VoxelInstanceLibraryMultiMeshItem.
Note
This LOD system exists because Godot 3 didn't have one. Godot 4 added automatic mesh LOD, which you might be able to use instead of this system. If you want to control the mesh and material used for each LOD, you may use this system.
While Visibility Ranges is presented as the alternative, when using MultiMesh it requires to unnecessarily duplicate the data and increase the number of scene objects to process.
To use this, you have to fill the 3 mesh LOD properties on your VoxelInstanceLibraryMultiMeshItem:

If only the mesh property is set, no LOD will be used.
If you need fewer LODs, you can assign twice the same mesh.
Note
Impostor meshes are simple quads that can fake the presence of the real model over far distances. For example, this is a really fast way to render forests from afar, while being able to use detailed trees when coming closer.
It is possible to customize the distances at which mesh LODs switch, under the Mesh LOD settings property group. They are defined as ratios (usually between 0 and 1) relative to the view distance of the corresponding terrain LOD (defined by lod_index).
It is also possible to hide instances that fall beyond the maximum distance of the last LOD. This is mainly useful if the terrain has no LOD, however keep in mind that instances will still be generated, they will just not be rendered.
Warning
There is currently a performance issue occurring when MultiMesh.mesh is changed to a different LOD. It should be easier to fix once this PR is merged into Godot.
Edition
Editing instances manually in the editor is not supported yet. It is only possible to define where instances spawn by using procedural generation.
It is however possible to remove them from within the game, when digging the ground they spawned on.
Persistence
It is possible for some items to be persistent. This option can be enabled with the persistent property of VoxelInstanceLibraryItem. If the parent terrain has a VoxelStream supporting it, then instances from edited blocks will be saved into the stream, and won't respawn next time the player gets close to the area. Non-persistent instances will always respawn on each surface where procedural conditions are fulfilled.
The ID of persistent items is important, because it will be used in saved data. If you delete an item and try to load instances from a stream that still contains them, warnings will occur.
At time of writing, only VoxelStreamSQLite supports saving instances.
The save format is described in this document.
Setting up a Multimesh item from a scene
It is possible to setup a Multimesh Item from an existing scene, as an alternative to setting it up in the inspector. The scene will be converted to fit multimesh rendering. One reason you could need this is to setup colliders, because although they are supported, it is not possible to set them in the inspector at the moment. It is also more convenient to design instances in the 3D editor using nodes.
There are two ways of setting up from a scene:
- Assign the
sceneproperty. This will convert the scene at runtime. The scene will be linked to the item, so it will stay updated if the scene changes. - Use the
Setup from scenebutton on top of the inspector. This does not link the scene, and rather assigns manual properties doing the conversion in the editor. The item will not update if the scene change. If the scene embeds meshes, materials or textures, they might end up being copied into the item's resource file.
The conversion process expects your scene to follow a specific structure:
- PhysicsBody (StaticBody, RigidBody...)
    - MeshInstance_LOD0 <-- "LOD" suffixes are optional but allow to specify the 4 LODs if needed
    - MeshInstance_LOD1
    - MeshInstance_LOD2
    - MeshInstance_LOD3
    - CollisionShape1
    - CollisionShape2
    - ...
Materials can be setup in two ways:
material_overrideon the MeshInstance- Materials on the mesh resource directly
Surface material properties on the MeshInstance node are not supported.
Scene instances
Multimesh items are fast and efficient, but have limitations.
Instancing scenes is supported by adding items of type VoxelInstanceLibrarySceneItem. Instead of spawning multimeshes, regular scene instances will be created as child of VoxelInstancer. The advantage is the ability to put much more varied behavior on them, such as scripts, sounds, animations, or even further spawning logic or interaction. The only constraint is, the root of the scene must be Node3D or derive from it.
This freedom has a high price compared to multimesh instances. Adding many instances can become slow quickly, so the default density of these items is lower when you create them from the editor. It is strongly recommended to not use too complex scenes, because depending on the settings, it can lead to a freeze or crash of Godot if your computer cannot handle too many instances.
Warning
If you add a scene to the library and then try to load that library from that same scene, Godot will crash. This is a cyclic reference and is hard to detect in all cases at the moment.
Procedural generation
Built-in generator

Items are added with a default built-in generator, so they will already spawn based on procedural rules rather than being painted manually. You can tweak the generator by inspecting the generator property of VoxelInstanceLibraryItem.
Persistent instances located in a block that was edited in the game will no longer regenerate.
Custom instance generator
The feature is recent and the API may still change, so this is not available to scripts at the moment.
Streaming events (advanced)
VoxelInstancer knows when to spawn things by registering itself to its parent's block events. This is currently not available to the script API of VoxelLodTerrain, but may be added in the future.